|
Topic: |
Automotive Lighting
3: Using flash |
|
Author/Copyright: |
John Jovic |
Using flashes (or strobes, it's the same thing) when
shooting cars has become quite easy with the instant feedback that comes from digital
cameras. Of course you can shoot cars without flashes, obviously you
can, but the flexibility and freedom you get from a handful of
moderately priced flashes is addictive and it lets you shoot cars in new
and different ways. Flashes won't solve all of your lighting problems
and there are certain things you can
do with simple
reflectors that you can't do as easily with small strobes, and vice versa.
There are also times when using flashes is the wrong course of action
but it's still very useful to know how and when to use them and how to
get the best out of them.
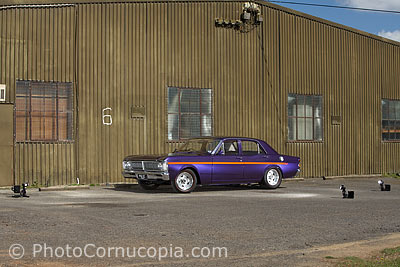
The examples below show some very simple ways to use flash,
simply to fill a shadow. You could use a reflector to do the same thing
in most cases, if there is sun to reflect.
 |
|
 |
|
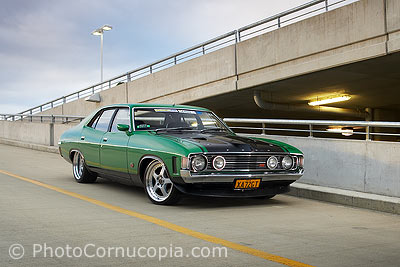
Without flash fill. |
|
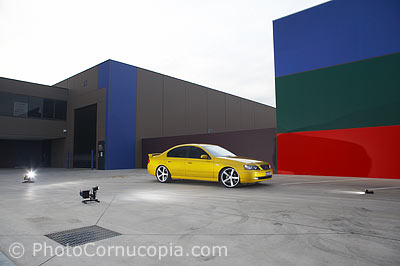
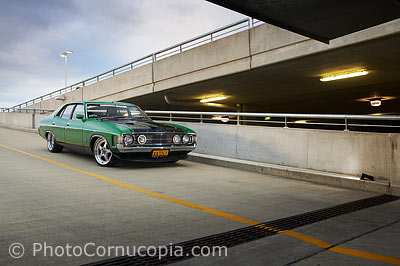
With flash fill. The shadow
side of the car should generally look a little darker then the sunny
side as this looks more natural. |
 |
|
 |
|
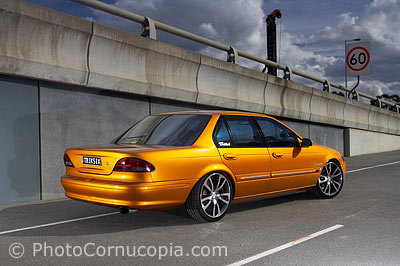
Here the car was mainly lit with ambient light but the grille was filled
with a small strobe. |
|
A Canon 580 EXII with PocketWizard
as used for the previous image. |
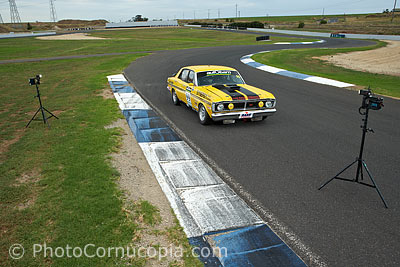
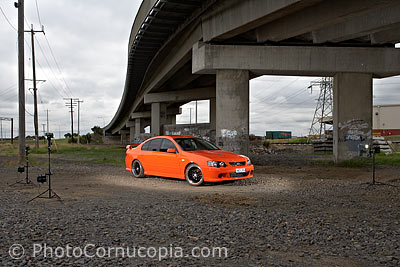
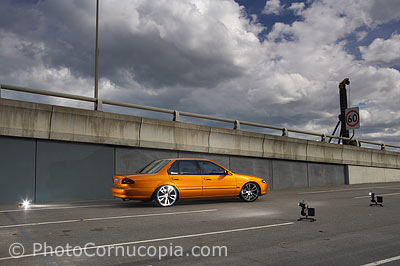
Strobes allow you to shoot in ways that simply might not
otherwise be possible, such as at night or shooting into the sun or
simply to under expose the background for effect.
 |
|
 |
|
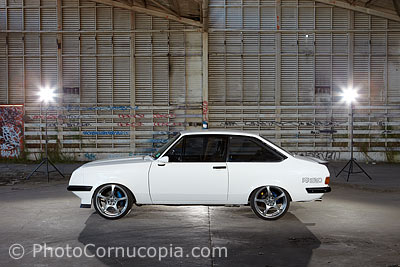
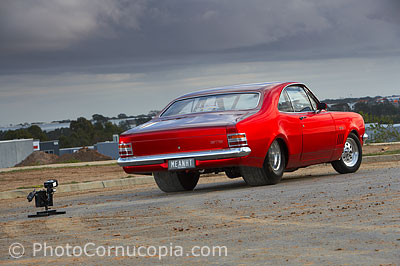
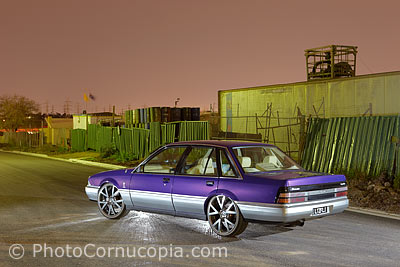
Shooting at night with strobes. |
|
A
dramatic sky was taken advantage of as a background. The car was in
total shade and was lit with strobes. |
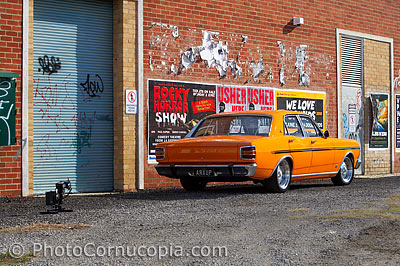
There are probably a couple of basic strobe lighting arrangements which
work quite well in most circumstances. Normally one strobe is used for
the front/rear and either one or two strobes are used to light the side
of the car. The type of paint used on the car has an influence in
determining the strobes needed because a normal non metallic paint can
usually be lit quite evenly with a single strobe. Metallic paints
usually need 2 strobes to light the side of the car evenly with each one
positioned to light the area above each wheel.
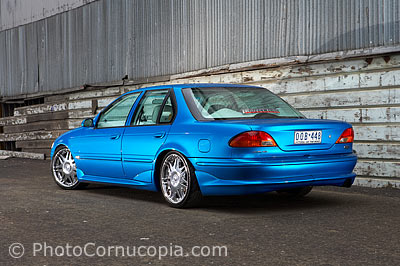
Flashes are very useful for making metallic colours 'pop'
particularly when there is no sun in the sky. Overcast days often lead
to drab colours and often the best way to bring the colours to life is
to light them with some direct light. Flashes seem most effective with
metallic paints for 2 reasons. Firstly they simply bring out the colour
that was meant to be seen but which simply doesn't appear without bright
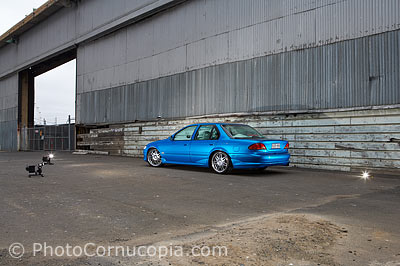
direct light. The second reason flashes work so well with metallic
paints is because the metallic paint gradually changes the way it
reflects the flash depending on the angle on incidence. This has the
effect of creating a smooth gradation in the way the flash is reflected
in the panel. This gradation simply does not happen with solid (non
metallic) colours which often look flat when lit with direct light such
as flash. Metallic paints require the light to be reflect directly from
the panel into the camera lens. This means the the strobe will generally
be effective on only a small part of the car, maybe only one quarter
panel, so more than one strobe is normally required to light the side of
the car. Typically one strobe is used to light the front quarter panel
and another for the rear.
Interiors, engine bay and details shots are well suited
to being shot with strobes, usually with light modifiers to give
a soft light. The consistent colour of the strobes also makes it
easier to get accurate colours compared to shooting in open
shade which is often quite blue.
 |
|
 |
|
Softboxes, or similar light
modifiers, are best suited for interiors, engine
bays and other detail shots where a soft light is
required. |
|
This
is a basic setup for shooting an interior. The
consistent colour and soft light from the softboxes
gives more vibrant colours than simply shooting an
interior without strobes, ie in shade. |
Small strobes fitted with radio slaves come in handy for
awkward spots like car interiors or engine bays where they can be used
for fill.
 |
|
 |
|
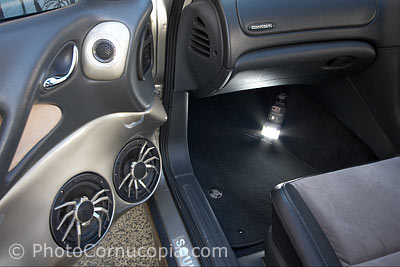
The speakers on the door trim have
been lit with a small strobe just enough to keep
them from disappearing into the darkness.
Without fill light the speakers are simply too dark
and lacking in detail. |
|
A small strobe with a radio
remote or optical slave can often be hidden in a
foot well and used as a fill light. |
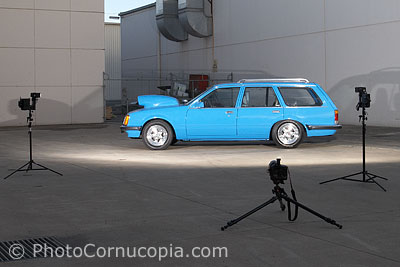
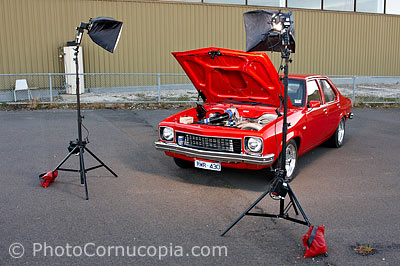
The height of any strobes should be
carefully considered for each individual light as there is no
single best height for strobes. You can not simply set all
lights at the same height and expect them to be effective, that
would be a 'schoolboy mistake'. Some strobes are best close to
the ground whilst others might need to be as high as possible.
The exact position of each strobe will almost always need to
be altered each time the camera itself is moved. This is the
reason zoom lenses are more practical than prime lenses when
photographing cars with strobes because you can simply zoom in
or out
and change the composition of the image without actually
repositioning the camera and potentially having to adjust the
lights to suit.
 |
|
 |
|
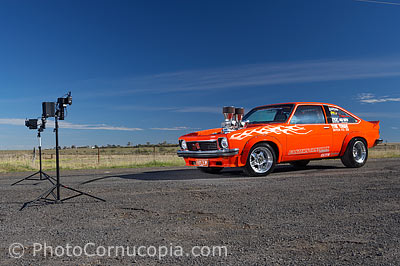
The lights were raised on stands so
that they would light the raised carburettors and
engine bay. |
|
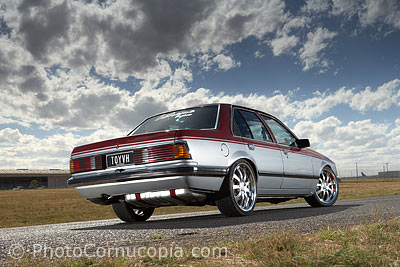
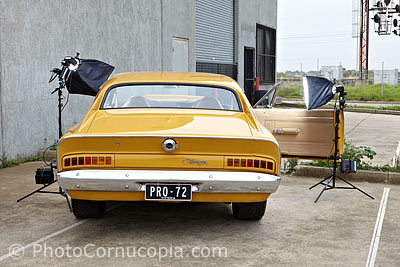
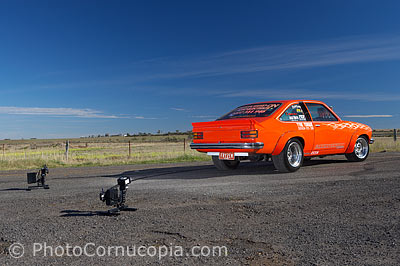
The lights were lowered for the rear shots so that they
would light the differential and tyres as much as possible. Using
strobes on stands may have prevented the rear tyres
being lit at all. Strobes positioned close to the
ground can have significant light spill which may
need to be controlled with barn doors or cutters
(stiff cards or similar) to shade the light. |
|