|
Topic: |
Automotive Lighting
2: Using filters |
|
Author/Copyright: |
John Jovic |
Filters can be valuable devices for controlling exposures, dynamic range
and for creative effects. The 2 most commonly used filters when
photographing a car are Polarising filters and Graduated filters. They
can be used separately or together as they have different purposes or
effects. Understanding their use, advantages and disadvantages can help
to tackle the various lighting problems that arise when photographing
cars.
 |
|
 |
|
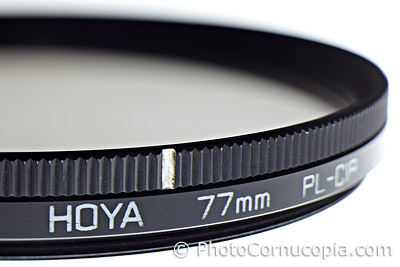
A Polarising filter. |
|
A Graduated Filter in
it's frame. The filter can be raised/lowered or rotated to perfectly
adjust it for any given shot. |
Using Polarising filters
A polarising filter
basically eliminates or reduces reflections from certain surfaces and in
certain circumstances. They can work well with glass and metal painted
surfaces and they can be used to darken the sky or remove reflections
from water. A polarising filter rotates and it's effect changes as it is
rotated. They have the effect of increasing colour saturation in some
circumstances by reducing unwanted reflections such as the sky, clouds
or glare. They can also be indispensible when photographing metallic
paints which need to 'pop' by having a hard light source reflecting in
the paint surface. The polarising filter is used to tame the reflection
of the bright light source allowing the metallic paint to appear vibrant
and saturated without the glare of the light source itself. Polarising
filters are potentially very useful when photographing cars but they
also have some disadvantages. The images
below show some typical uses for polarizing filters in car photography.
Polarising filters can have negative effects such as
reducing the modelling effect of the light reflecting in the car. It's
the reflection of light in a cars panels that lets us see it's shape and
form. Polarising filters can remove these reflections so much that it
becomes difficult or impossible to see the curves or shapes of the cars
panels leaving the car looking flat.
 |
|
 |
|
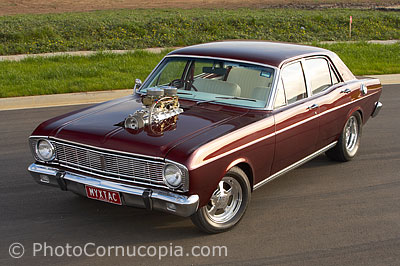
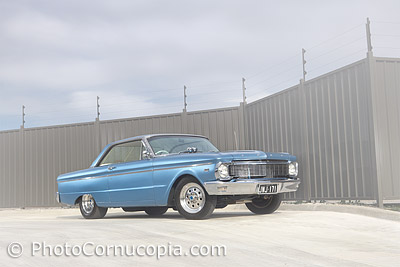
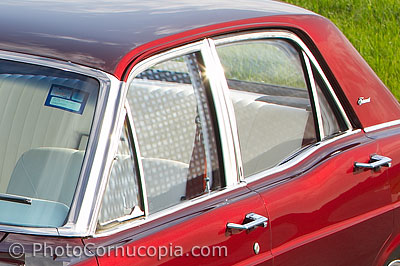
The Polarising filter was set to minimise the light reflecting in the
side panel of the car. Notice the effect of the polarising filter on the
side windows of the car where patterns have become visible. These
effects are due to the types of glass used and in this case 2
different types of glass have been used so the effect is not the
same for front and rear door windows. |
|
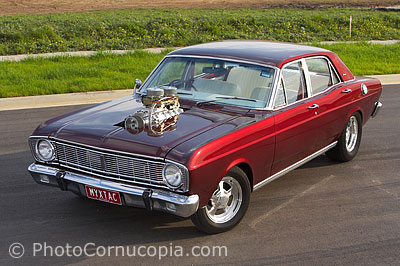
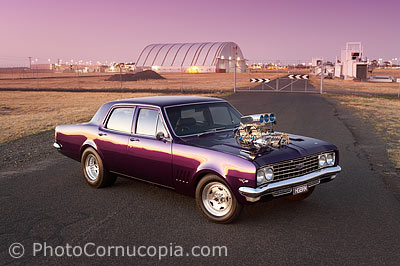
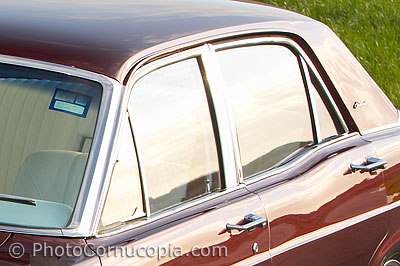
Polariser set to minimise
reflection in front windscreen and bonnet so had no effect on the side
of the car. |
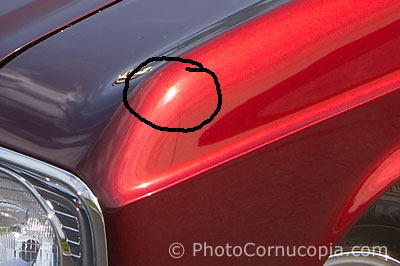
Polarising filters can also create
odd colorful reflections in plastic head lights, which can easily be
fixed in post processing by selectively desaturating the offending
effect. These can be considered
an advantage or a disadvantage depending on your point of view. Polarising filters can also create similar reflections in glass which
can look a little like oil stains on a wet road.
Using Polarising filters with flash
Polarising filters can be used to reduce or eliminate glare or
reflections which might otherwise mask the effect of the flash. Removing
or reducing glare gives stronger colour saturation. Of course this also
requires more power from the flashes themselves as the Polarising filter
will generally reduce an exposure by about 1.5 stops.
 |
|
 |
|
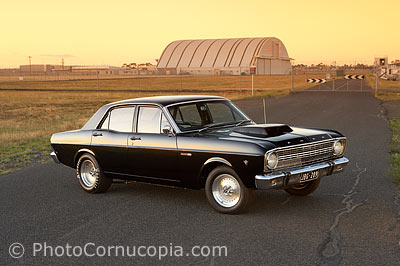
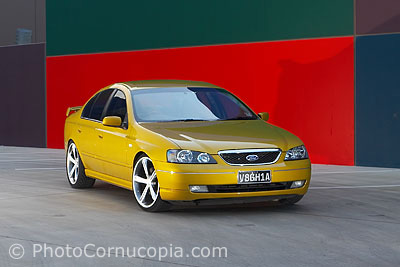
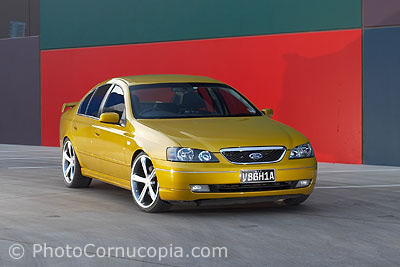
Here the Polarizing filter has been set to eliminate
reflections on the side of the car so that the flashes will work most
effectively and not have to compete with any bright
reflections in the panels, see next image. However
the reflections in the windscreen are prominent and
distracting. The glare in the windscreen can also be
eliminated but the Polarising filter has to be set
in a different orientation as can be seen in the
subsequent image. The 2 images are later combined or
'composited'. |
|
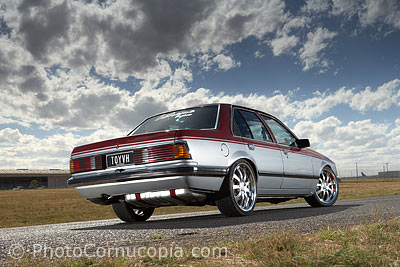
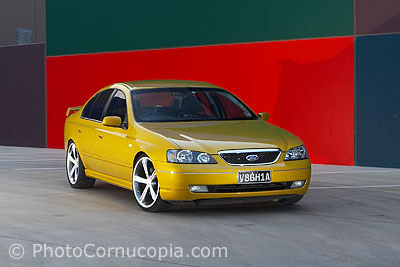
Here the Polarizer has been
set to eliminate reflections from the windscreen. Note how the
background, a painted wall, also becomes brighter and less saturated as
does the side panel of the car. |
 |
|
 |
|
It only takes a few minutes to composite the 2 images together to get the best of both worlds.
In this example it was easiest to use the first
image as a background (because only the windscreen
in that image needed alteration, instead of
everything except the windscreen) and selectively
darken the windscreen with a Layer Mask of the
second image with the darker windscreen and the
appropriate blending mode, 'Darken'. |
|
This is the lighting setup for the above 2 images. Only
the Polarizer was altered in the above 2 images. All RAW processing
setting are identical.
|
Graduated Filters
Graduated filters are usually a square or rectangular filter
which is held on the front of a lens with the appropriate frame
or filter holder. The filters themselves have a section which is
clear and another which is neutral (grey) or a colour such as
amber, blue or magenta to name just a few. The filter can be
slid up or down within the frame and adjusted to darken any part
of the frame, usually a part of the sky. Graduated filters are
commonly used in landscape photography to control the dynamic
range in an image by darkening brighter parts of an image. Many
car images are simply landscapes with a car so this filter
technique is a valuable one when shooting cars. Graduated
filters can be combined with polarising filters as their effects
are different.
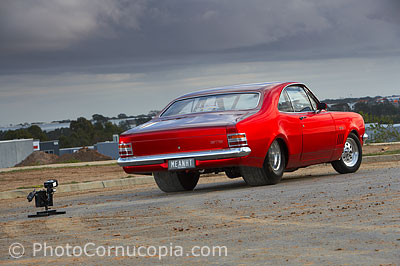
In both of the above examples a Graduated Neutral
Density could have been used instead of coloured Grads but may not have
been as effective or dramatic It would still have darkened the sky and
therefore kept more colour saturation than if no Grad had been used at
all. Graduated filters are probably the most commonly used filter in car
photography and are normally used in very subtle ways rather than to
dramatically darken the sky as in some of the examples above.
Graduated filters are available in many variations such as strength (1,
2 or 3 stop), colour (Sunset/Amber, Neutral, Blue, Magenta etc) and rate
of gradation (how quickly the change takes place from completely clear
to filtered). A medium strength is most practical and a selection of 1
and 2 stop filters in Neutral, Sunset/Amber/Yellow and Magenta (or FLW)
are most commonly used.
Graduated filters are also available in many sizes or filter 'systems'
such as Cokin P or Z, Lee, or a range of other sizes from Tiffen and
other manufacturers. A collection of filters can be quite expensive so
it's best to buy into a system which is likely to last rather than to
out grow a cheaper or smaller system and have to start all over again.
The larger the filter the easier it is to use with wide angle lenses but
they are also much more expensive and cumbersome to carry so a
compromise is often necessary. The Cokin P system is quite cheap,
flexible and effective but is not really suitable for very wide angle
lens where a larger Lee 100mm or Cokin Z style of filter would be
preferable. Note that systems are not always compatible as even the
thickness of the filters themselves can some times vary between brands
of filters.
Unfortunately many of the systems use a form of plastic filter which
although quite cheap is also fairly soft and therefore easy to scratch
when cleaned. Cleaning marks or fine scratches also increase the
likelihood of flare which is a very important consideration for any
filter facing a bright light sources, a typical use for a graduated
filter. Tiffen is one company which offers glass graduated filters in
various sizes and these perform extremely well and are very easy to keep
clean with much less likelihood of scratching and therefore flare.
However they are very expensive.
|